Using the Arduino IDE 1.6.6 Serial Data Plotter
We recently downloaded the newest release of the Arduino IDE (integrated development environment). It's the software used to program Maker Board, so we always look for the coolest features that we can use.
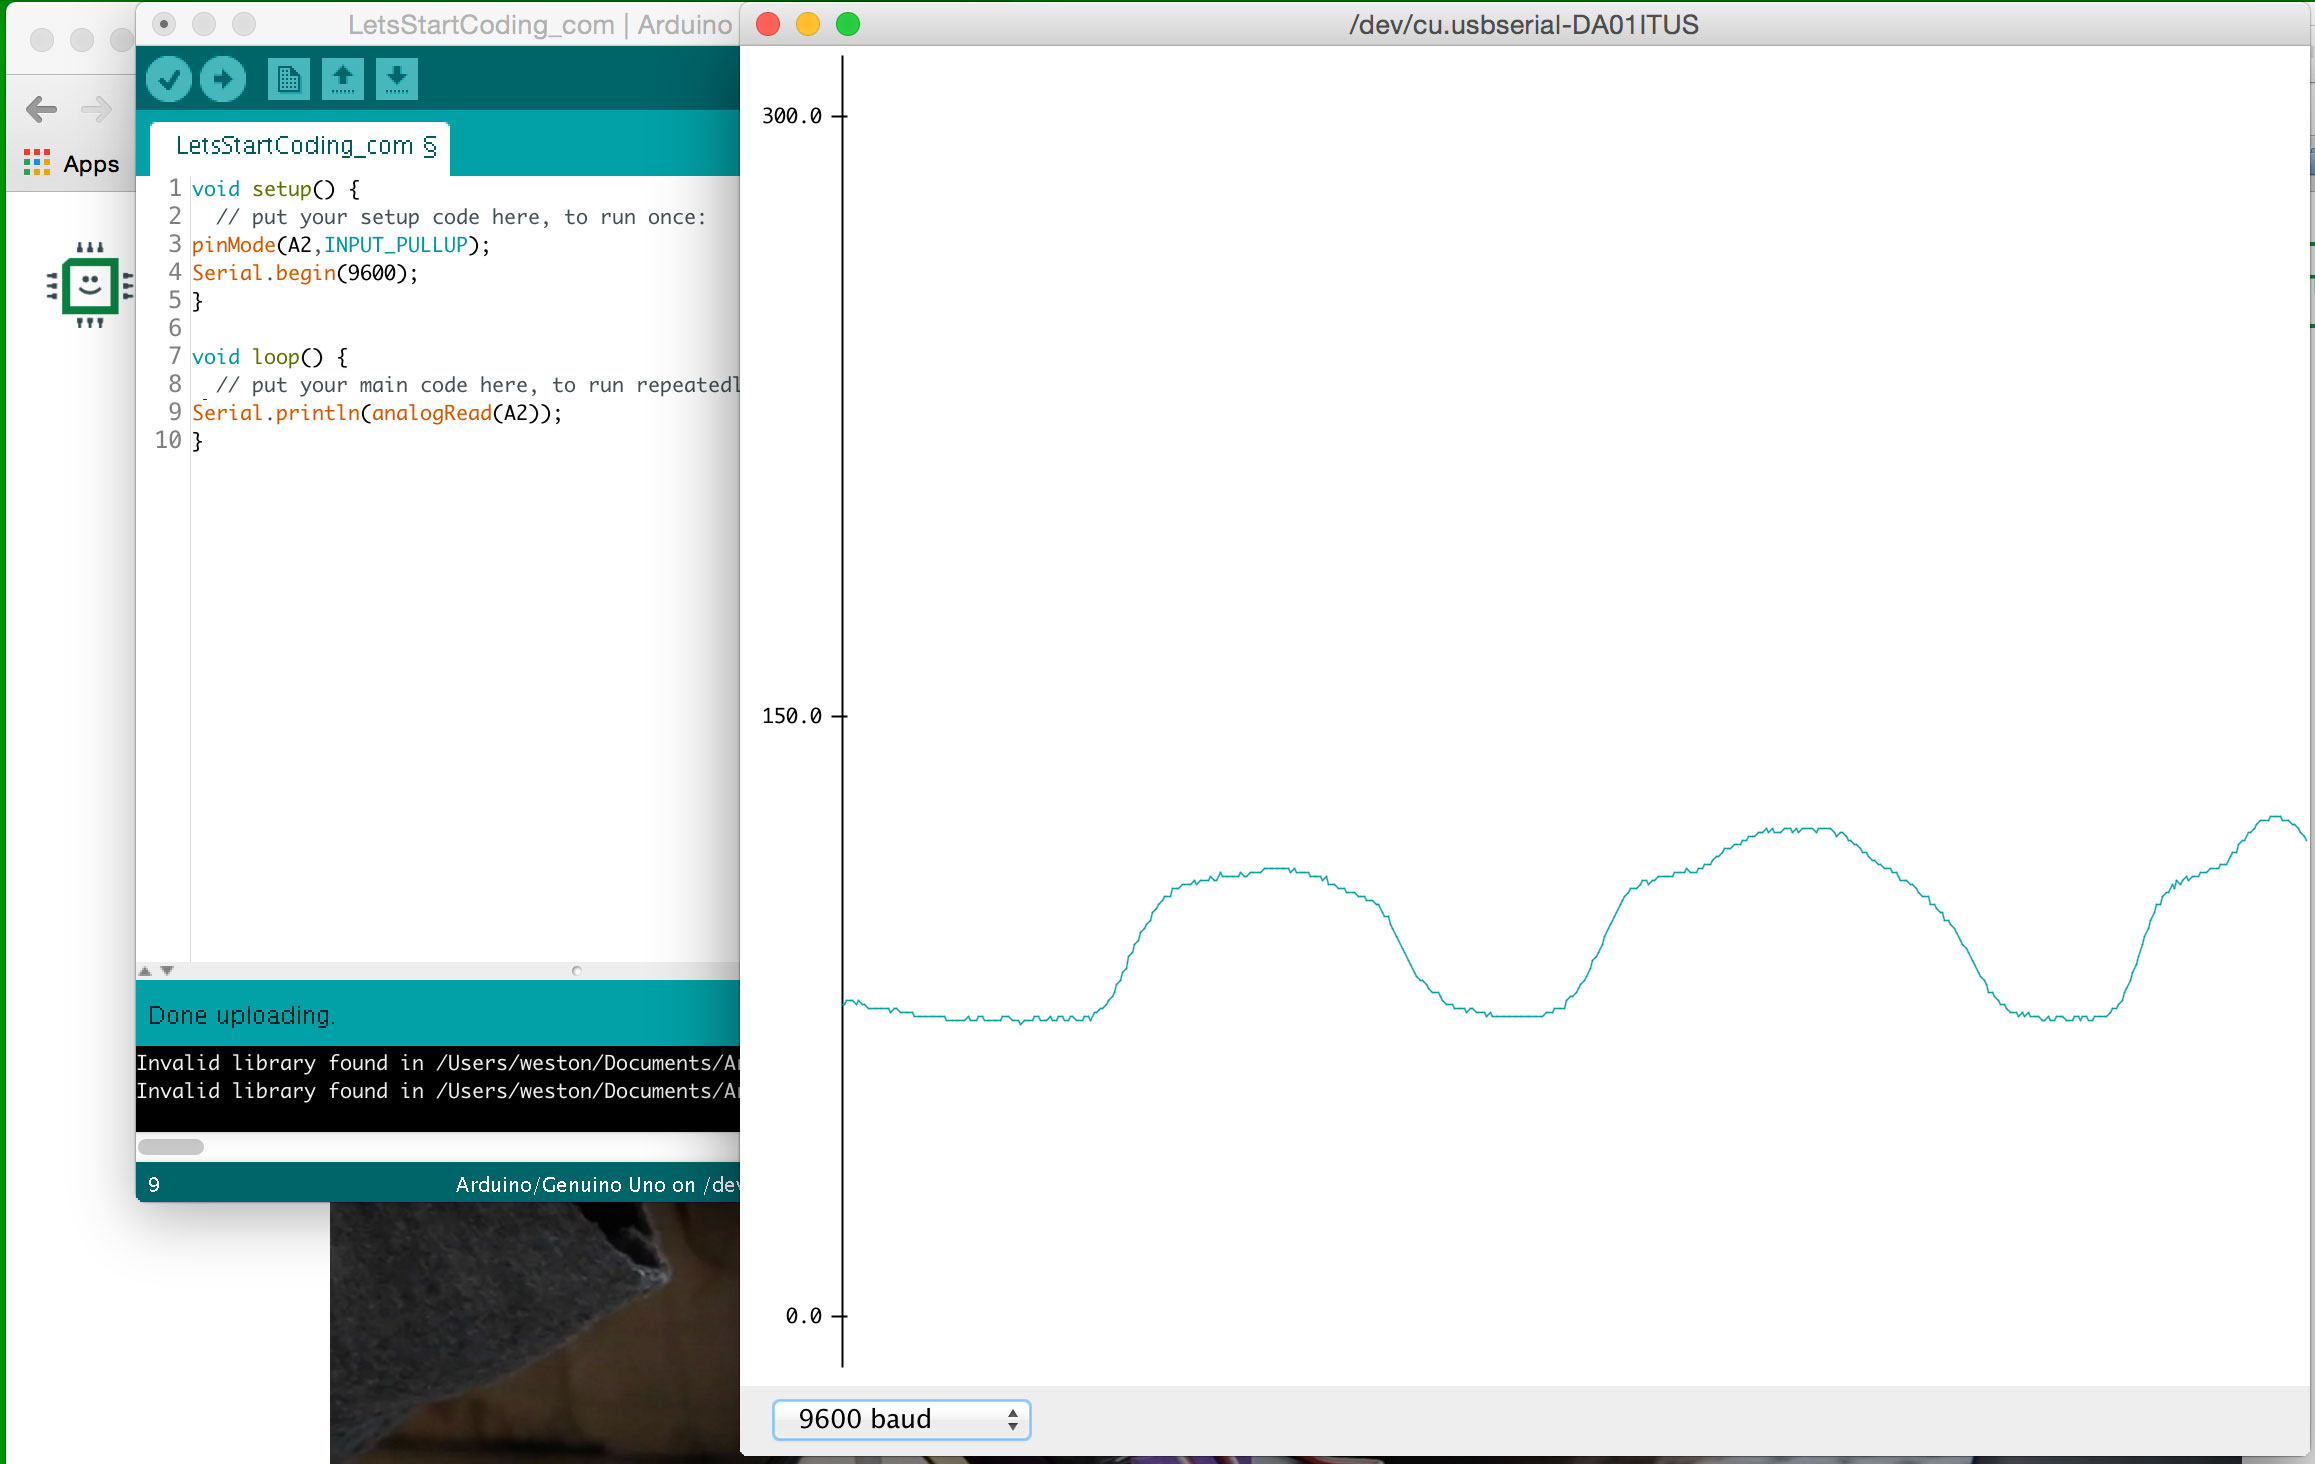
In this release, the coolest new feature has to be the "Serial Plotter" which takes in data from a sensor (like a light sensor, sound sensor, or temperature sensor) and graphs it on a moving line chart. Since this feature is new and you'll definitely want to incorporate it into your projects, we want to share some info about how you can use it.
1) What's this good for?
Microcontrollers like the Maker Board or Arduino Uno boards are good at gathering data from the real world, but they haven't been able to display it simply and graphically like this before. The graphing feature of the Serial Plotter allows you to quickly see relative changes in your data without looking at a stream of number values or copying and pasting the data to Excel or Google Sheets.
2) When do I use it?
The Serial Plotter will work best for analog sensors. Those are the sensors that can report a range of values. Think about a light switch. It has only two values: on or off. Now think about a dimmer switch. It has a range of values, including off, on, 50% on, 23% on, and every value between 0 and 100%. Those types of sensors will be the most interesting to use with Serial Plotter.
3) How do I Write code for it?
If you're familiar with the Serial Monitor, the Serial Plotter will be an easy next step for visualizing your readings.
First, you need to create a program that uses an analog sensor. This could be a light reading, a distance sensor, or a sound trigger. Once your component is ready in the void setup(){ } portion of your code, write:
Serial.begin(9600);
also in the void setup(){ } section of your code.
Then, in the loop of your code, type the Serial Print Line command:
Serial.println( Your reading or variable here) ;
That line will send the reading to the Serial Monitor / Serial Plotter.
Each time your code loops over the Serial.println( ) line, the newest reading is sent to the Serial Plotter.
4) Where do I find it?
First, be sure that you have downloaded the Arduino IDE version 1.6.6. The top of your Arduino window should say 1.6.6.
After you have written your code that uses the Serial.println() command, upload it to your Maker Board or other Arduino-compatible microcontroller. Then, navigate to Tools--> Serial Plotter. A new window should pop up and start displaying your data!
5) Other Notes
- From our tests, we are able to fit about 120 readings on the Serial Plotter. If you delay 500 milliseconds (half a second) between readings, you'll get about 4 minutes worth of data in a single Serial Plotter window. Double the time between readings, you'll double the amount of data (in minutes) that is visible.
- There does not appear to be a way to scroll back through historical data that has been graphed but is no longer in the Serial Plotter window.
- You are not allowed to open both the Serial Monitor and the Serial Plotter at the same time.
- You cannot graph multiple readings on two separate lines at the same time. It appears that the most recent reading is the one that will show up on the Serial Plotter.
Is All of this new to you?
That's great! You're starting to learn about code and how it can tie in to the world around you. If you need a hand, we've designed kits, projects, and resources to help beginners in the world of writing code that interacts with the real world.


