SHOP > Buzz the Code Bug Details
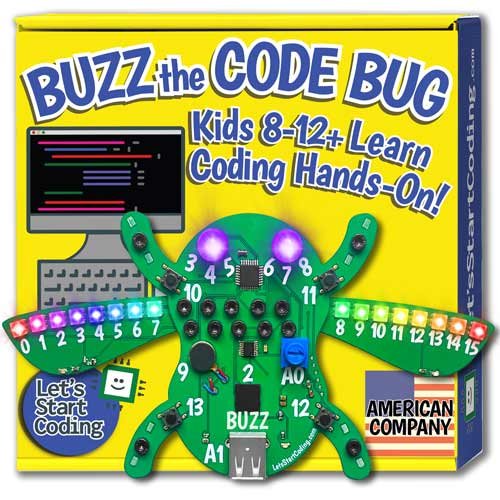
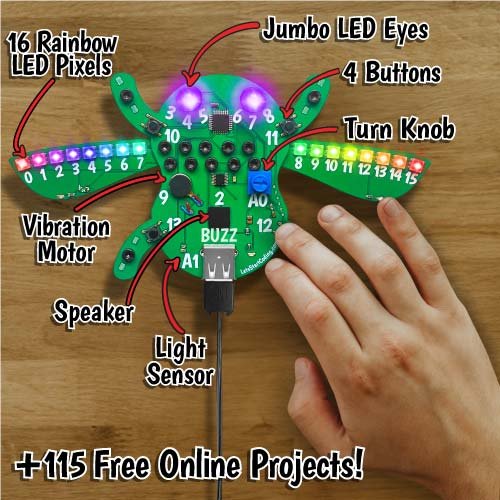
Buzz brings a big personality in a small package! With multicolor LED eyes, a speaker that can chirp, a jittering vibration motor, light sensor, turn knob, and buttons, and rainbow LED pixel wings, Buzz can interact and engage with kids 8-12 who want to learn to code. Kids can connect with Buzz because he’s a “character” that they code to show different moods or feelings. Everything is included in the box to build Buzz and code him. No soldering required! Our innovative connection method allows kids to make electrical connections with the included nuts, bolts, and hex key tool. With over 115 projects, challenges, and “bug hunts”, kids will use Buzz for months as they learn basic C++ coding concepts like variables, functions, syntax, statements, styling, and more!
- Buzz circuit board with ATMEGA328P microchip
- Rainbow LED pixel wings
- Circuit board feet that attach to Buzz's legs
- Nuts, bolts, and hex key tool to attach Buzz's feet and wings
- USB cable
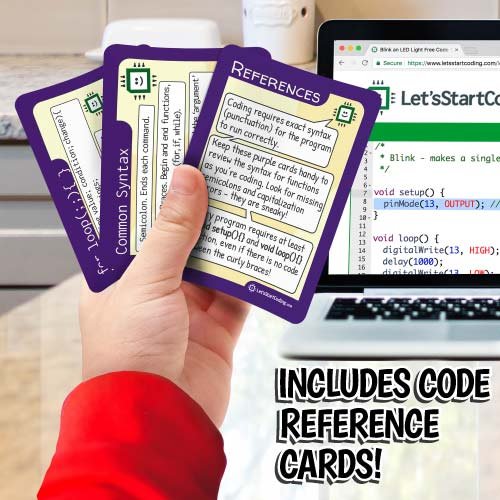
- Instruction and code reference book
When you buy a Let's Start Coding kit, you get much more than a box of 'stuff'. Free with every kit is access to our downloadable coding software for Windows, Mac, or Chromebook computers, plus tons of learning content. For Code Lab, this includes:
- 115+ sequenced project pages that cover the fundamentals of all coding languages
- Thousands of lines of example code that can be modified or tinkered with
- Hours of walkthrough videos that accompany the projects,explaining how the code works so kids can make changes of their own
- Code 'challenges' and 'bug hunts' that encourage kids to interact and engage with the code, strenghtening their learning
Using the free online software in a Google Chrome or Microsoft Edge browser on Windows, Mac, or Chromebook desktops or laptops (no tablets or phones), coders can complete over 100 projects through 9 "chapters" that help organize and sequence the kits so kids don't get lost or overwhelmed. Click each chapter below to see the projects included in it.
Chapter Zero: Setup
0.0 Build Buzz & First Code Upload
0.1 Code Editor Tour
0.2 Project Page Tour
Chapter One: Single Functions
1.0 Blink
Bug Hunt: 1.0 Blink
1.1 Single Beep
1.2 Jitter Buzz's Motor
1.3 Two Synced LEDs
Bug Hunt: 1.3 Two Synced LEDs
1.4 Play 3 Tones
Bug Hunt: 1.4 Play 3 Tones
1.5 Serial Print Each Loop
1.6 Alternating Blinks
Bug Hunt: 1.6 Alternating Blinks
1.7 Jitter and Blink
1.8 analogWrite Brightness
1.9 analogWrite Motor Jitter
1.10 Single LED Pixel
1.11 Light Entire LED Wingspan
1.12 Blink Entire LED Wingspan
1.13 RGB LED Color Mixing
Chapter Two: Combined Functions
2.0 Blink and Beep
Bug Hunt: 2.0 Blink and Beep
2.1 Jitter and Beep
2.2 Buzz and Beep and Blink
2.3 Beep and Blink Wings
2.4 LED Wingspan Siren
2.5 Two RGB LED Mix
2.6 Sound and Light Show
2.7 Fade LED and Tone Together
Chapter Three: Conditionals
3.0 Press For Light
3.1 Press For Sound
3.2 Press To Jitter Motor
3.3 Hold for Light
3.4 Hold for Motor Jitter
3.5 One Note Piano
Bug Hunt: 3.5 One Note Piano
3.6 Hold For Pixel
3.7 Hold for Entire Wingspan
3.8 Serial Print Button Press
3.9 RGB Color Mixer
Bug Hunt: 3.9 RGB Color Mixer
3.10 Twist For Light
3.11 Twist For Jitter
3.12 Digital Light Sensor Switch
3.13 Automatic Nightlight
3.14 LED Pixel Nightlight
3.15 Two Threshold Nightlight
Chapter Four: Functions Inside Functions
4.0 Random Blink Delays
4.1 Random Beep Delays
4.2 Random Jitter Delays
4.3 Serial Print Random Values
4.4 Random Tones
4.5 Random Motor Jitter Strength
4.6 Random Tones & Random Delays
4.7 Random LED Colors
4.8 Random LED Wings Color
4.9 Random LED Strip Pixel & Color
4.10 Random LED Strip Pixel & Color
4.11 Random Delays for Beeps & Blinks & Jitter
4.12 Press for a Random LED Wingspan Color
4.13 Light Sensor Theremin
4.14 Show Light Sensor Readings on Serial Monitor
4.15 Turn Knob Tone
4.16 Show Turn Knob Values on Serial Monitor
4.17 digitalWrite() a digitalRead()
4.18 Turn Knob LED Brightness
4.19 Turn Knob Motor Strength
4.20 Turn Knob Blink Delay
4.21 Show Button & LED Status on Serial Monitor
Chapter Five: Constant Variables
5.0 Constant Blink Variable
5.1 Constant Beep Variable
5.2 Serial Print Constant Variable
5.3 Four Note Piano Variables
5.4 Variable Key Piano
Chapter Six: Toggle Variables
6.0 LED Flashlight
6.1 Serial Monitor Toggle Variable
6.2 Motor 'Latch'
6.3 Random Tone 'Latch'
6.4 Toggle Wings On and Off
6.5 Toggle Pixels Between Colors
6.6 Toggle Between 2 LEDs
6.7 Toggle Between 3 LEDs
6.8 Toggle Between 2 LEDs With A Shadow
Chapter Seven: Linear Variables
7.0 Serial Print a Counter
7.1 Rising Tone Variable
7.2 Rising Brightness Variable
7.3 Rising Motor Jitter
7.4 Variable LED Wing Color
7.5 Variable LED Pixel Count
7.6 Blink Delay Divided By 2
7.7 Button Raises Tone
7.8 Buttons Raise and Lower Tone
7.9 Buttons Raise and Lower LED Brightness
7.10 Buttons Raise and Lower Motor Strength
7.11 Button Doubles Speaker Tone
7.12 Button Sets LED Wingspan Color
7.13 Turn Knob Wingspan Brightness
7.14 Turn Knob LED Brightness
7.15 Turn Knob Tone
7.16 Turn Knob Motor Strength
7.17 Turn Knob Blink Delay
7.18 Turn Knob Beep Delay
7.19 Turn Knob Sets Wingspan Color
Chapter Eight: Environmental / Threshold Variables
8.0 Light Sensor Sets LED Wings Brightness
8.1 Light Sensor Sets LED Eye Brightness
8.2 Light Sensor Sets LED Wing Color
8.3 Light Sensor Sets Motor Strength
8.4 Light Sensor Pixel Bounce
8.5 LED Eye Color Light Sensor
8.6 Turn Knob Nightlight Threshold
8.7 Party in the Dark
Chapter Nine: For Loops
9.0 Fade Up LED
9.1 Fade Up Tone
9.2 Fade Up Motor Strength
9.3 Fade Up Tone and Print Variable Value
9.4 Fade LED Up and Down
9.5 Tone Up and Down
9.6 Pixel Sequence
9.7 LED Rainbow
9.8 LED Pixel Light Meter
9.9 Blink Row of LEDs
9.10 LEDs 'Up and Back'
9.11 Motor Strength Fades Up and Down
9.12 LED Pixel Brightness Fade
9.13 Control LED Pixels with Knob
9.14 Changing Color Pixel Bounce
- Coding in the C++ (see-plus-plus) coding language
- Microcontroller is ATMEGA 328P, like the Arduino Uno board
- Software is compatible with Windows 7, 8, 10 and Mac OSX 10.9 and above, plus Chromebooks.
- Software requires internet connection to code.
- No batteries are required - the board is powered by the USB port.


