// Copyright 2007, Sandeep Gangadharan // For more free scripts go to http://www.sivamdesign.com/scripts/
 

Hack The Code Car

Blink Hookup: 1 LED in pin 13. Remember shorter leg of LED is ground.
 

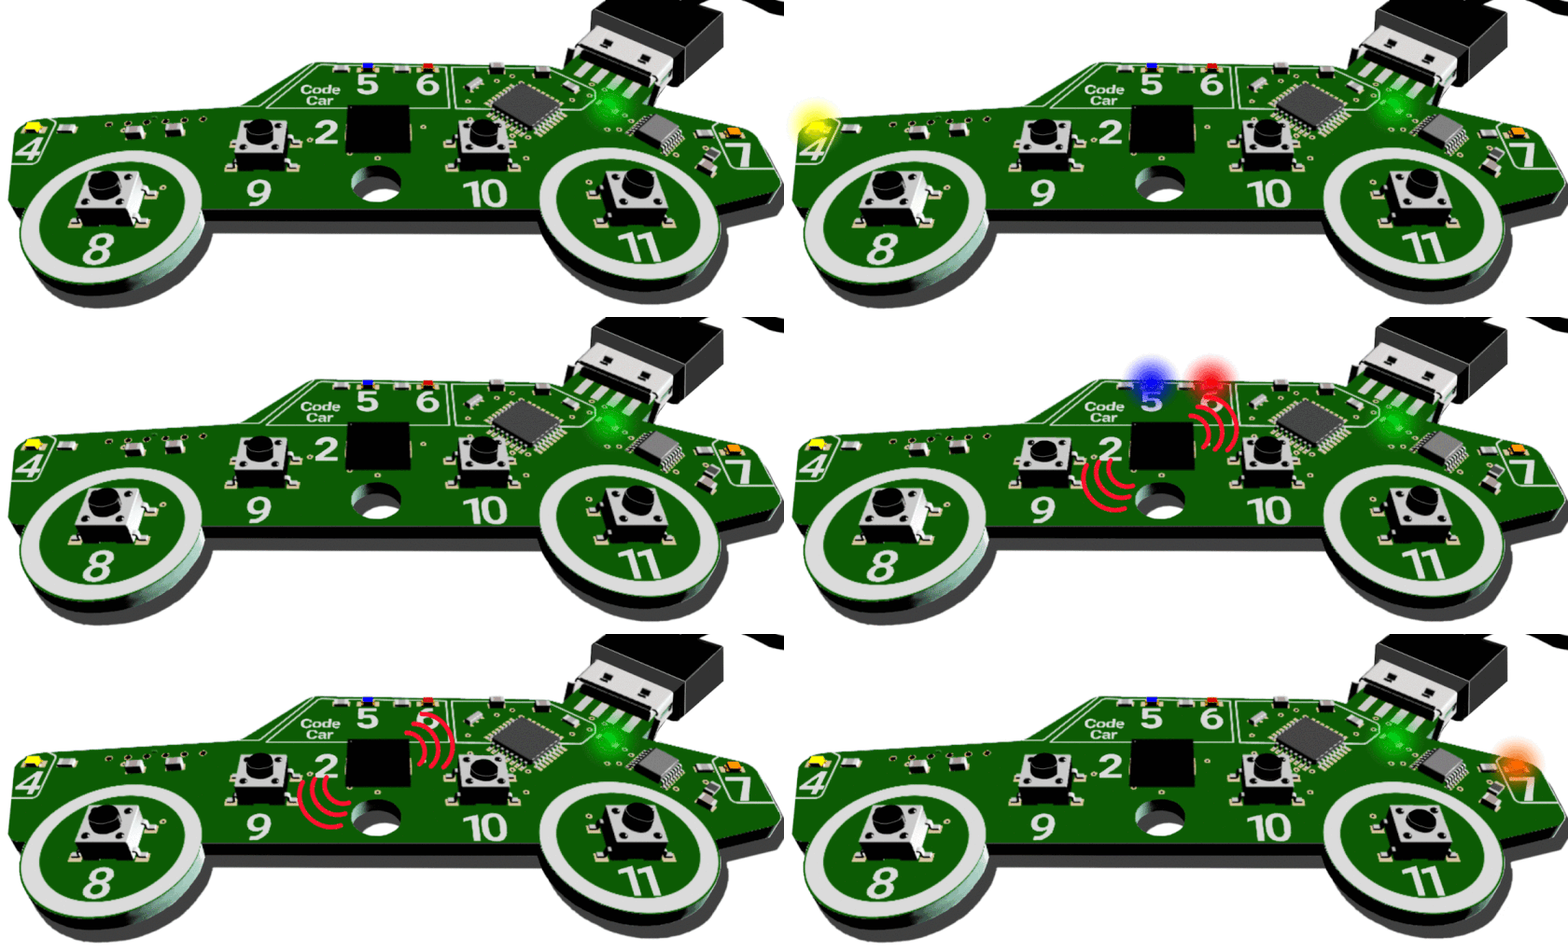
The ultimate Code Car creation! This 'hack' page doesn't cover any specific topics, but it gives you the chance to dig through some working code and tinker with how it functions. Don't be afraid to change numbers and break things- the "Restore" button in the code editor will bring the Code Car back into a working state. 

Watch the walkthrough video if you want a line-by-line explanation of what's happening in the program, but if you want to dig into each concept step-by-step, we recommend checking out the lessons.

Code

The code below already works and is ready to upload! Upload the code to Code Car and see what happens. Then, you'll 'take apart' the code to learn what each piece of the program does.

/* * Code Car with a headlight switch, a siren light fading button, a horn, and a brake 'pedal' */ int headlight = 0; void setup() { //Each button needs a pinMode command to be used as an input pinMode(8,INPUT_PULLUP); pinMode(9,INPUT_PULLUP); pinMode(10,INPUT_PULLUP); pinMode(11,INPUT_PULLUP); pinMode(2,OUTPUT); //the speaker pin is set as an output //Each LED light needs a pinMode command to be used as an output pinMode(4,OUTPUT); pinMode(5,OUTPUT); pinMode(6,OUTPUT); pinMode(7,OUTPUT); } void loop() { //An if-else statement for the 'horn' if (digitalRead(10) == LOW) { //if button 10 is pressed... tone(2, 350); //play a tone of 350 hertz on pin 2 (speaker) } else { //otherwise if button 10 is not pressed... noTone(2); //play no tone on pin 2 } //an 'if' statement and two 'for' loops to fade the siren lights up, then down. if (digitalRead(9) == LOW) { //if button 9 is pressed... for (int i = 0; i < 256; i++) { //create a variable called 'i' that is equal to 0. Until it equals 255, run the 'for' loop and increase 'i' by one each time the loop runs analogWrite(5, i); //Send a value of 'i' as the brightness for LED 5. It will start at 1, then increase by 1 each time the 'for' loop runs, until 'i' equals 255. analogWrite(6, i); //Send a value of 'i' as the brightness for LED 6. It will start at 1, then increase by 1 each time the 'for' loop runs, until 'i' equals 255. tone(2,(i*10)); //play a tone of "i*10" hertz on the speaker. This tone will rise as the loop runs. delay(3); } for (int i = 255; i >= 0; i--) { //create a NEW variable called 'i' that is equal to 255. As long as 'i' is greater than or equal to 0, decrease it by 1 each time the 'for' loop runs. analogWrite(5, i); //Send a value of 'i' as the brightness for LED 5. It will start at 255, then decrease by 1 each time the 'for' loop runs, until 'i' equals 0. analogWrite(6, i); //Send a value of 'i' as the brightness for LED 5. It will start at 255, then decrease by 1 each time the 'for' loop runs, until 'i' equals 0. tone(2,(i*10)); //play a tone of "i*10" hertz on the speaker. This tone will fall as the loop runs. delay(3); } } //an 'if' statement for the headlight switch if (digitalRead(8) == LOW) { //if button 8 is pressed... headlight = 1 - headlight; //make the value of the 'headlight' variable either 1 or 0, the 'opposite' of what it previously was digitalWrite(4, headlight); //use the headlight variable to send a value of 1 (HIGH) or 0 (LOW) to the headlight LED delay(250); //wait 250 milliseconds before switching the variable again. } //'brake pedal' if (digitalRead(11) == LOW) { //if button 11 is pressed... digitalWrite(7, HIGH); //turn on the brakelight LED } else { digitalWrite(7, LOW); //otherwise, turn the brakelight off. } }//curly brace to end the loop // (c) 2023 Let's Start Coding. License: www.letsstartcoding.com/bsdlicense
 

Walkthrough Video

Watch the video for line-by-line explanation of how the example program works. Then you'll be ready to make some changes of your own!