LED Volume Indicator
Step 1 - Build the Project
Use a sound trigger to change the brightness of an LED. The louder the noise, the brighter the LED!
Step 2 - Upload the Code
Step 3 - Read the Walkthrough
For this program, you'll use many of the built-in Arduino functions to take a sound reading, map that reading to a brightness value, then constrain that brightness value to the range 0-255. Each time the loop runs, a new sound reading is taken and displayed on the light.
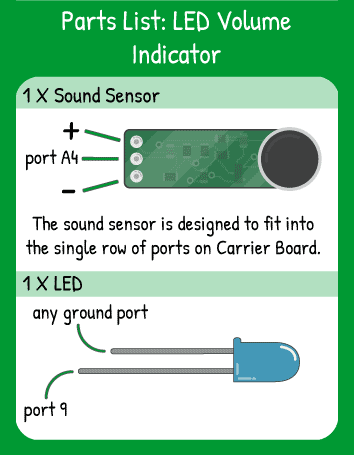
First, set up your sound trigger's center pin as an INPUT and the LED as an OUTPUT.
The first variables you create are the integers soundMin and soundMax. They each have 'const' in front of them, which means "I'm not going to change the value of these variables throughout the code.". The value of soundMin should be the lowest reading you record in your environment. soundMax should be the loudest sound reading you'll typically record. To find these values, you can either experiment or use the component guide for taking sound readings.
Next, create an integer variable brightness. The value of this variable will be between 0 and 255. To turn your sound readings (250-450) into brightness values (0-255), you use the map() function. In this case, you're taking the value of analogRead(A4) and forcing that value onto the scale of 0 to 255. A reading of soundMin becomes a brightness of 0 and a reading of 450 becomes a brightness of 255.
Now you'll constrain the value of the brightness variable. The sound trigger spikes above the soundMin and then drops below it when a noise occurs- it's not a pure microphone. By using constrain so that brightness can not have a value below 0 or above 255, you are sure that the code won't try to write a negative brightness to the light.
Finally, you use the analogWrite() command to send the 'brightness' brightness to pin 9.


