Serial Print Sound Trigger Reading
Step 1 - Build the Project
When you're using a sound trigger, it's really helpful to take some baseline readings so you know, for example, what kind of reading a clap will make.
Step 2 - Upload the Code
Step 3 - Read the Walkthrough
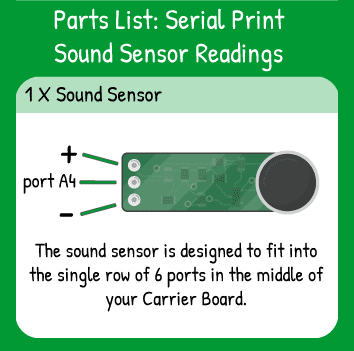
First, make the center pin of the sound trigger an INPUT in the pinMode. For our Carrier Boards, the sound trigger should fit with a + and - pin for 5V power and ground. Start the serial communication with Serial.begin(9600). The 9600 is the communication speed- use 9600 unless you have a reason to use anything else.
The loop will print the label "Sound:" and then the reading from the port where your sound trigger is plugged in. After you have uploaded your code, press the "Monitor" button to pop open a serial monitor below the code window. Tap on your sound trigger or clap your hands to see the values change with sound changes.
In the bottom left-hand side of the window, there is a check box for 'autoscroll'. You can un-check it so that the values don't flow by too quickly for you to see. Now you'll have an idea of how high a clap takes the reading and what a quiet room 'sounds' like to the sensor.
Something to remember when you use the sound trigger: Sound moves quickly! A clap takes less than a second to fill the air with sound and disappear. When you're using the sound trigger, you cannot use delays and expect to 'hear' sounds as they happen. A delay of half a second can easily cause the sound trigger to miss a noise. This will affect the way you use the sound trigger, especially when using it with other sensors as well.


