LED STRIP Counter
Step 1 - Build the Project
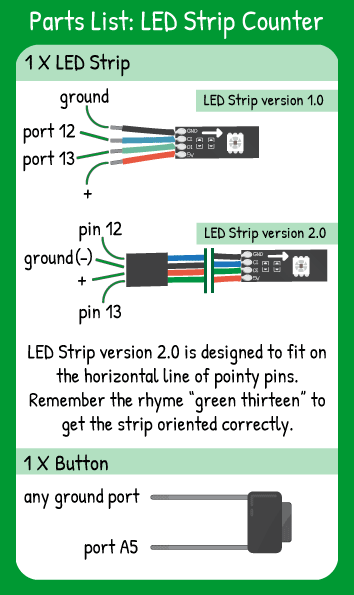
Use a button to count up to 70 on the LED strip using two colors of light- one for the ones place and the other for the tens place.
Step 2 - Upload the Code
Step 3 - Read the Walkthrough
First include the LEDStrip library. This library gives you access to a new set of commands (called methods) that make using the LED Strip easier. Without including the library, the Arduino software won’t recognize the new methods.
Next, create an integer called numPixels. Its value should be equal to the number of LEDs on your strip.
The other integer is count- it will hold the number of times the button is pressed.
Set the pin mode for A5 as an INPUT_PULLUP so that when the button is pressed, a LOW signal is sent to Maker Board.
In the loop, the first line creates an integer ‘button’ to hold the value of digitalRead(A5), which is HIGH or LOW. This variable isn’t necessary, but makes the rest of the loop easier to understand and read.
If the button is pressed, a while loop begins for the entire time the button is pressed. This while loop means that the code doesn’t move forward until the button is released. Why do this? It helps ensure that each button press is counted only one time, rather than a single press accidentally counting more than once.
After the button is released, the while loop breaks and the count variable increases by 1 with the incrementer (++).
Next, you check to see if the count has reached 70 and reset the count to 1 if that is true.
The strip.clear() method clears every pixel on the strip, so now you have a blank strip with no pixels lit up.
A for loop runs a set number of times. In this for loop, you create a variable i and make it equal to 0. Then, until i is no longer less than count%10, you run the for loop and add one to i (i++). Inside the for loop, you use the i variable to decide which pixel to light up. So the first time through, you will light pixel 0. The next time, you’ll light pixel 1. This continues until i is equal to count %10.
%10 is pronounced ‘mod 10’ and its a tool called modulo. The result of 10%10 is 0, because 10/10 is 1 with a remainder of 0. The result of 12%10 is 2 because 12/10 is 2 with a remainder of 2. The result of 120%10 is 0 because 120/10 is 12 with a remainder of 0.
The next for loop creates a new variable called i and, while it is less than count/10, increments by one each time the for loop’s commands run. Each time the for loop runs, it starts at the tip of the strip (numPixels-1) and subtracts the value of i and draws that pixel red.
After both of these for loops have run (which is much quicker than you can see), the strip.draw() command actually displays all of the commands in .setPixel. There can be up to 15 .setPixel commands stored up and strip.draw() executes them all.


