LED Strip Single Pixel Example
Step 1 - Build the Project
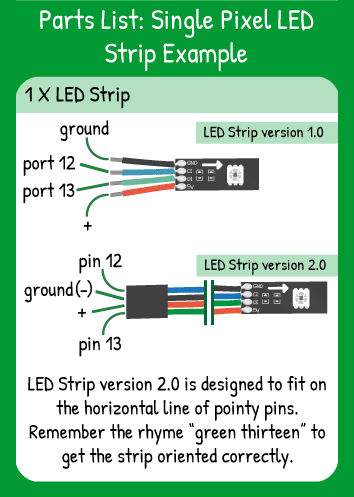
Turn on a single pixel on your LED strip. Play around with the different patterns you can make with only a few lines of code!
Step 2 - Upload the Code
Step 3 - Read the Walkthrough
First include the LEDStrip library. This library gives you access to a new set of commands (called methods) that make using the LED Strip easier. Without including the library, the Arduino software won’t recognize the new methods.
To tell the library the name & attributes of your LED Strip, you create an object. In this case, the object is called ‘strip’ and it has 15 pixels, the data pin is number 13, and the clock pin is number 12 on your carrier board.
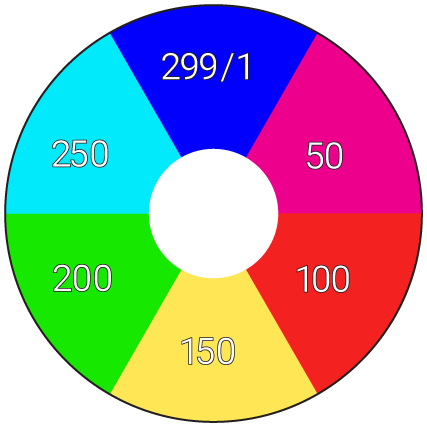
In the loop, use the .setPixel() method to tell the strip which pixel to light, what color to make that pixel, and what brightness that pixel should be.
The strip.draw() command sends the setPixel values to the strip so you can see them.
Use this color wheel as a reference for which values in your code will create a certain color. Experiment to find just the right hue!


